Introduction
Below is an example of a webpage, with some added CSS code.
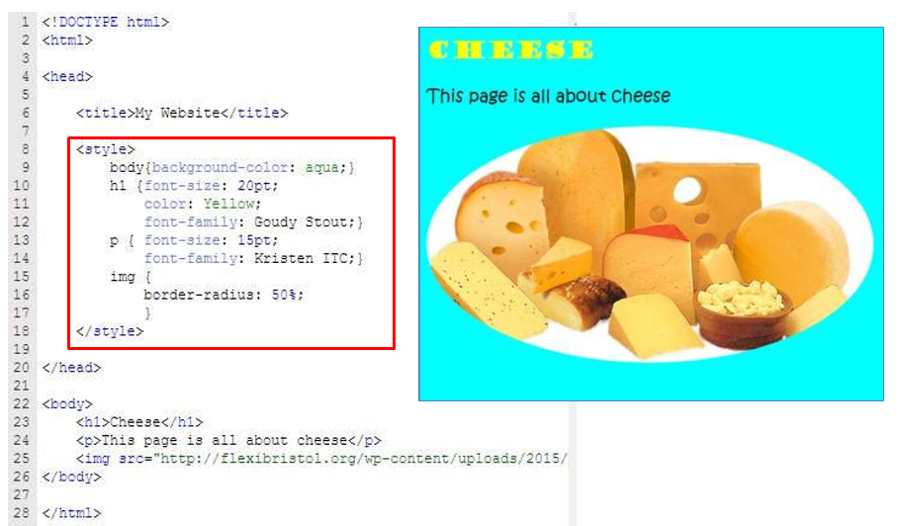
The way that it works is that CSS 'STYLES' the HTML tags on the page. For example, you can see that the text written between the <h1> tag has now been styled so that it is size 20, yellow in colour and written in a different font.
How do we add CSS? Where does it go?
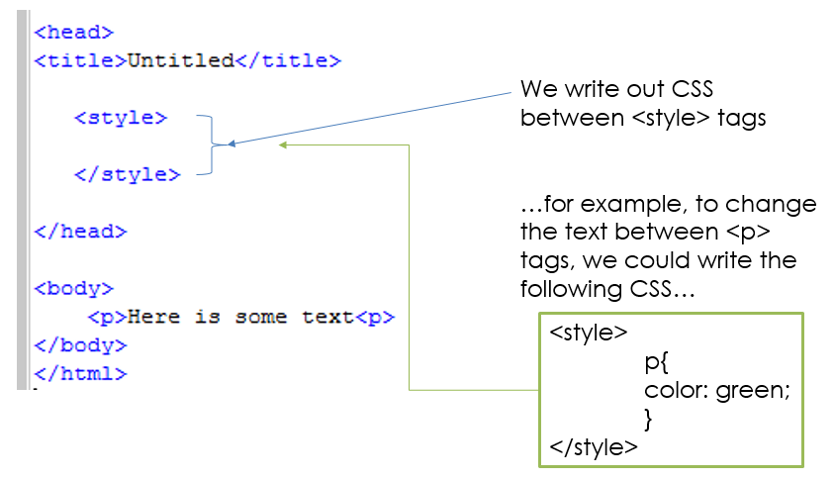
To add CSS code to our webpage, we write it between <style> tags.
Because CSS code is NOT page content, we don't place our <style> tags between the <body> tags.
Instead, we add our <style> tags between the <head> tags at the top of our page of code.
An Example
Using CSS to change the background
Remember, the <body> tags can be thought of as the page, with the opening <body> tag as being the top of the page and the closing </body> tag as being the bottom of the page. So, if we want to change the background of the page we can apply some CSS code to the <body> tags.
Adding a plain background colour
The code below is an example of the CSS code required to add a colour to the webpage:
Adding a gradient background with multiple colours
With CSS we can also create gradient backgrounds where more than one colour can be blended together. The code below is an example of the CSS code required to add gradient backgrounds to the webpage:
Adding a page border
With CSS code it is also possible to add a page border. Often when we do this, we have to add some padding to the edges of the page, moving the page content in from the side and down from the top. Otherwise the border will be placed on top of the page content. Below is an example of the code required to add a border to the webpage:
...and if we want to the border to be slightly curved at the top-left corner, we can apply the following code:
Styling Images
We can also style images using CSS by applying some CSS code to the <img> tag. For example we could curve the edges of an image to improve its presentation. Below is an example:
The Current Issue with CSS
The issue that we have at the moment is that if we apply some CSS code to a particular tag (for example a <p> tag), the CSS will style EVERY SINGLE <p> TAG on the webpage. This is obviously fine if you want every piece of text to look the same, but imagine that you wanted to change the colour or font of certain sentences...with our knowledge so far, this would not be possible.
Introducing DIV Tags (Division tags)
To get over the problem outlined above, we can split our webpage up into divisions. For example, we could have some page content in section 1, some more in section 2 and so on. We could give each division an ID and we could then apply some CSS code to some tags BUT ONLY those contained inside a particular section.
Below is an example of using DIV tags on a webpage in order to create 3 invisible sections. Notice how each division has been given a name (an ID). For example #section1
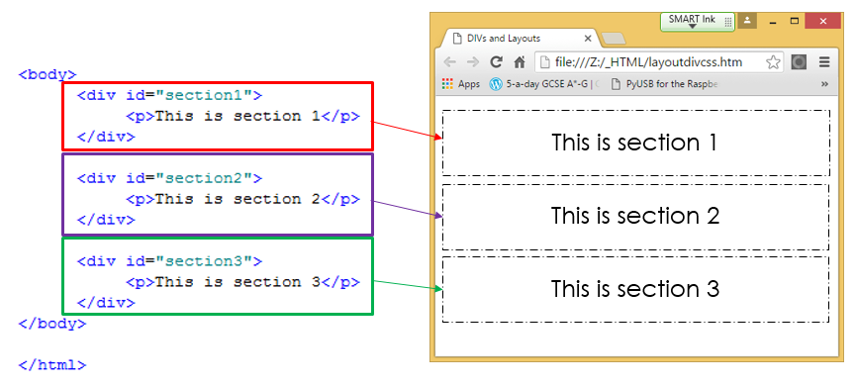
In this next image you can see how CSS code can be applied to the <p> tags in different sections. This shows how we can style the same tag type (<p>) differently across different parts of our page (colours show how the 3 lines of CSS code and the 3 divisions link up):
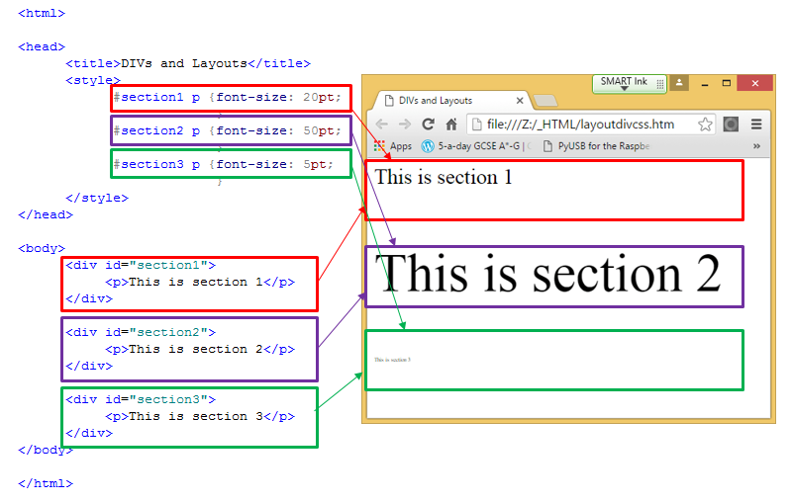
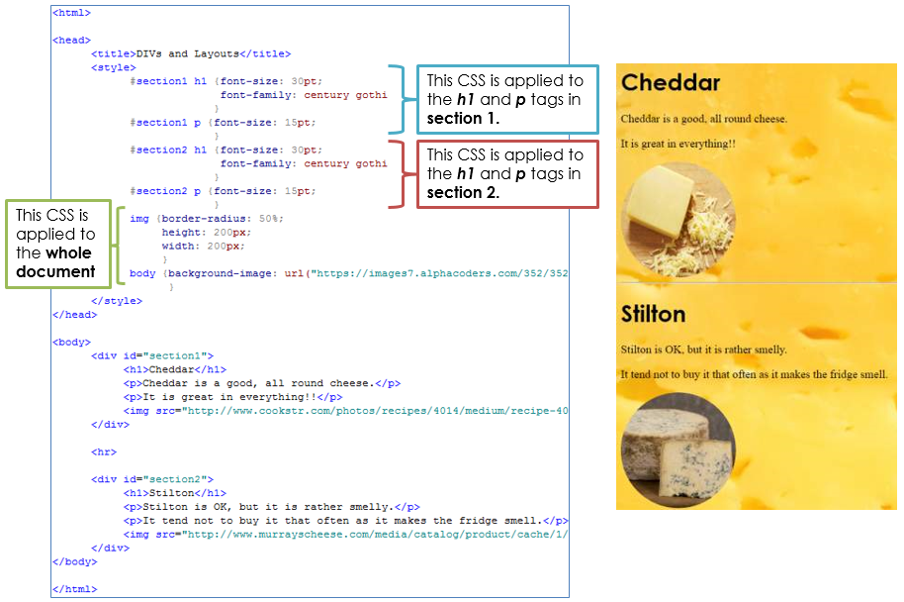
Finally in the example below you can see how CSS code can be applied to the whole of the webpage or to certain divisions only, depending on whether or not the CSS code begins with a division name (e.g.: #section1):
